New to fastlane? Click here to open the installation & setup instructions first
1) Install the latest Xcode command line tools
xcode-select --install
2) Install fastlane
# Using RubyGems
sudo gem install fastlane -NV

# Alternatively using Homebrew
brew cask install fastlane
3) Navigate to your project and run
fastlane init
Continuous Integration
Best Practices
Two-step or Two-factor auth
Separate Apple ID for CI
The easiest way to get fastlane running on a CI system is to create a separate Apple ID that doesn't have 2-factor auth enabled, with a long, randomly generated password. Additionally make sure the newly created Apple account has limited access to only the apps and resources it needs.
There are multiple reasons on why this approach is much easier:
- An Apple ID session is only valid for a certain region, meaning if your CI system is in a different region than your local machine, you'll run into issues
- An Apple ID session is only valid for up to a month, meaning you'll have to generate a new session every month. Usually you'd only know about it when your build starts failing
There is nothing fastlane can do better in that regard, as these are technical limitations on how App Store Connect sessions are handled.
Creating a separate Apple ID allows you to limit the permission scope, have a randomly generated password, and will make it much easier for you to set up CI using fastlane.
Use of application specific passwords and spaceauth
Before going through this guide, make sure to read the section above.
If you want to upload builds to TestFlight / App Store Connect from your CI machine, you need to generate an application specific password:
- Visit appleid.apple.com/account/manage
- Generate a new application specific password
- Provide the application specific password using the environment variable
FASTLANE_APPLE_APPLICATION_SPECIFIC_PASSWORD
Because your CI machine will not be able to prompt you for your two-step or two-factor auth information, you also need to generate a login session for your CI machine in advance. You can get this by running:
fastlane spaceauth -u user@email.com
This will generate a token you can set using the FASTLANE_SESSION environment variable on your CI system.
Environment variables to set
Most setups will need the following environment variables
FASTLANE_USER: Your App Store Connect / Dev Portal user, if your fastlane setup accesses iTC or the DevPortal (e.g. submit a TestFlight build, create a profile, ...)FASTLANE_PASSWORD: Your App Store Connect / Dev Portal password, usually only needed if you also set theFASTLANE_USERvariableMATCH_PASSWORD: You need to provide the password of your match encryption if you use matchFASTLANE_APPLE_APPLICATION_SPECIFIC_PASSWORD: You need to provide an application specific password if you have 2-factor enabled and use pilot or deliver to upload a binary to App Store ConnectLANGandLC_ALL: These set up the locale your shell and all the commands you execute run at. fastlane needs these to be set to an UTF-8 locale to work correctly, for exampleen_US.UTF-8. Many CI systems come with a locale that is unset or set to ASCII by default, so make sure to double-check whether yours is set correctly.
Deploy Strategy
You should not deploy a new App Store update after every commit, since you still have to wait 1-2 days for the review. Instead it is recommended that you use Git Tags, or custom triggers to deploy a new update.
You can set up your own Release job, which is only triggered manually.
fastlane.ci
Since January 2018, the fastlane team started working on fastlane.ci, an open source, self hosted, mobile optimized CI powered by fastlane.
It's still an early work in progress, and will take some time to be ready for production.
Jenkins Integration
Deploying from your own computer isn't cool. You know what's cool? Letting a remote server publish app updates for you.
fastlane automatically generates a JUnit report for you. This allows Continuous Integration systems, like Jenkins, access the results of your deployment.
Installation
The recommended way to install Jenkins is through homebrew:
brew update && brew install jenkins
From now on start Jenkins by running:
jenkins
To store the password in the Keychain of your remote machine, it is recommended that you run match or deliver using ssh or remote desktop at least once.
Ruby Environment
We recommend using rbenv for installing Ruby, though rvm and the version of Ruby that comes bundled on macOS are fine too.
If using a Gemfile in your project, add an "Execute shell" step as your first build step and call bundle update.
Plugins
You'll find the following Jenkins plugins to be useful:
(note: We do not recommend installing the Xcode plugin)
- HTML Publisher Plugin: Can be used to show the generated screenshots right inside Jenkins.
- AnsiColor Plugin: Used to show the coloured output of the fastlane tools. Don’t forget to enable
Color ANSI Console Outputin theBuild Environmentor your project. - Rebuild Plugin: This plugin will save you a lot of time.
- Keychains and Provisioning Profiles Plugin: Manages keychains across Jenkins installations.
Build Step
Add an "Execute shell" build step using your appropriate fastlane command per the example below:
fastlane appstore
Replace appstore with the lane you want to use.
(note: if using a Gemfile, prefix that command with bundle exec)
setup_jenkins
You can use setup_jenkins action which integrates well with the Keychains and Provisioning Profiles Plugin. Selected keychain will automatically unlocked and the selected code signing identity will be used. Also all build results, like IPA files, archives, dSYMs and result bundles will be stored in the ./output folder in the job workspace. In additions setup_jenkins will create separate derived data folder for each job (in the ./derivedData).
Under the hood setup_jenkins configures other actions like: gym, scan, xcodebuild, backup_xcarchive and clear_derived_data.
commit_version_bump || git_commit
You can use commit_version_bump or git_commit action to commit changes to your repository in your fastlane setup. When you are using webhooks to trigger your build on a push this will cause an infinite loop of triggering builds.
Gitlab
When you are using Gitlab you will need the GitLab Plugin. Inside the job you want to configure you go to Build Triggers > Build when a change is pushed to GitLab > Enable [ci-skip].
When you include [ci-skip] in your build this commit won't trigger the build in jenkins at all.
Example
build_number = increment_build_number
commit_version_bump(message:"[ci-skip] Version Bump to #{build_number}")
git_commit(path:"./CHANGELOG.md", message:"[ci-skip] Updated CHANGELOG for Build #{build_number}")
push_to_git_remote
Test Results and Screenshots
To show the deployment result right in Jenkins
- Add post-build action
- Publish JUnit test result report
- Test report XMLs:
fastlane/report.xml
To show the generated screenshots right in Jenkins
- Add post-build action
- Publish HTML reports
- HTML directory to archive:
fastlane/screenshots - Index page:
screenshots.html
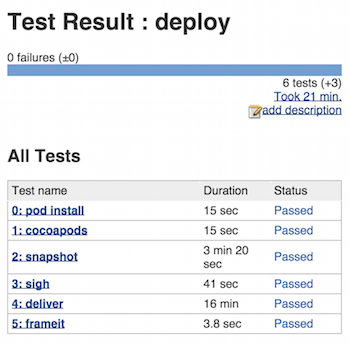
Save and run. The result should look like this:
CircleCI Integration
To run fastlane on CircleCI, first create a Gemfile in the root of your project with the following content:
# Gemfile
source "https://rubygems.org"

gem "fastlane"
and run
gem install bundler && bundle update
This will create a Gemfile.lock that defines all Ruby dependencies. Make sure
to commit both files to version control.
Next, add the following to your Fastfile:
# fastlane/Fastfile

...
platform :ios do
  before_all do
    setup_circle_ci
  end
  ...
end
The setup_circle_ci fastlane action will perform the following actions:
- Create a new temporary keychain for use with match (see the CircleCI code signing doc for more details).
- Switch match to readonly mode to make sure CI does not create new code signing certificates or provisioning profiles.
- Set up log and test result paths to be easily collectible.
Next, create a .circleci directory in your project and add a
.circleci/config.yml with the following content:
# .circleci/config.yml

version: 2
jobs:
  build:
    macos:
      xcode: "9.0"
    working_directory: /Users/distiller/project
    environment:
      FL_OUTPUT_DIR: output
      FASTLANE_LANE: test
    shell: /bin/bash --login -o pipefail
    steps:
      - checkout
      - restore_cache:
          key: 1-gems-{{ checksum "Gemfile.lock" }}
      - run: bundle check || bundle install --path vendor/bundle
      - save_cache:
          key: 1-gems-{{ checksum "Gemfile.lock" }}
          paths:
            - vendor/bundle
      - run:
          name: fastlane
          command: bundle exec fastlane $FASTLANE_LANE
      - store_artifacts:
          path: output
      - store_test_results:
          path: output/scan
This will do the following: Create and use a Ruby gems cache. Run the test lane on all pushes. * Collect Junit test results and store log output in the Artifacts tab.
Check out the CircleCI iOS doc for more detailed examples of using fastlane on CircleCI.
Travis Integration
Update your .travis.yml to look like this:
language: objective-c
osx_image: xcode8.3
install:
  - bundle install
script:
  - fastlane beta
The above config files assume you have a Gemfile set up, if you don't have one yet, make sure to follow our Gemfile guide and run bundle update to make sure you're using the most recent fastlane release.
Replace beta with the lane you want to run for your setup. If you want to build, sign and distribute builds from Travis, you'll need to add one more action to your Fastfile, as by default, the Travis keychain is locked.
At the top of your Fastfile, add
setup_travis
which will setup the keychain to work well with match and gym. This action will also enable the readonly mode for match, so your CI doesn't create new certificates or provisioning profiles.
Bamboo Integration
Repository setup
In bamboo under Linked Repositories (where you configure your git repo) under Advanced Settings is an option called Exclude changesets
This dialog will allow you to enter a regular expression that if a commit matches, a build will not be triggered.
For example, if your Fastfile is configured to make a commit message in the style of
Build Version bump by fastlane to Version [0.3] Build [8]
Then you could use the following regex to ignore these commits
^.*Build Version bump by fastlane.*$
Setting repository remote
By default bamboo will do an anonymous shallow clone of the repo. This will not preserve the git remote information nor the list of tags. If you are using bamboo to create commits you may want to use a code block similar to the following:
# In prep for eventually committing a version/build bump - set the git params
sh('git config user.name "<COMMITTER USERNAME>"')
sh('git config user.email <COMITTER EMAIL>')

# Bamboo does an anonymous checkout so in order to update the build versions must set the git repo URL
git_remote_cmd = 'git remote set-url origin ' + ENV['bamboo_repository_git_repositoryUrl']
sh(git_remote_cmd)
Speeding up build times with carthage
Carthage is a wonderful dependency manager but once you are start using a large number of frameworks, things can start to slow down, especially if your CI server has to run carthage EVERY time you check in a small line of code.
One way to make build times faster is to break your work up into two separate build plans (this can get even more funky if you start having multiple branches)
The general idea is to make a build plan: Project - Artifacts that builds the Carthage directory and stores it as a shared artifact. Then you create a second build plan Project - Fastlane that pulls down the Carthage directory and runs fastlane.
Artifact Plan
Use a simple setup to create this build plan. First off you want to make sure this plan is manually triggered only - because you only need to run it whenever the Cartfile changes as opposed to after ever single commit. It could also be on a nightly build perhaps if you desire.
Stages / Jobs / Tasks
This plan consists of 1 Job, 1 Stage and 2 Tasks
- Task 1: Source Code Checkout
- Task 2: Script (
carthage update)
Artifact definitions
Create a shared artifact with the following info:
- Name: CarthageFolder
- Location: (leave blank)
- Copy Pattern: Carthage/Build/**
Optional: You may want to automatically make the fastlane plan trigger whenever this plan is built
fastlane plan
When configuring fastlane to run in this setup you need to make sure that you are not calling either:
reset_git_repo(force: true)
or
ensure_git_status_clean
as these calls will either fail the build or delete the Carthage directory. Additionally you want to remove any carthage tasks from inside your Fastfile as carthage is now happening externally to the build.
Build plan setup
What this build plan does is it checks out the source code, then it downloads the entire Carthage/Build/ directory into your local project - which is exactly what would be created from carthage bootstrap and then it runs fastlane
- Task 1: Source Code Checkout
- Task 2: Artifact Download
- Task 3: fastlane
GitLab CI Integration
Use GitLab Runner running on a macOS machine to build using fastlane.
Repository setup
First create a Gemfile in the root of your project with the following content:
source "https://rubygems.org"

gem "fastlane"
Add a .gitlab-ci.yml file to trigger fastlane.
stages:
  - unit_tests
  - test_flight

variables:
  LC_ALL: "en_US.UTF-8"
  LANG: "en_US.UTF-8"

before_script:
  - gem install bundler
  - bundle install

unit_tests:
  dependencies: []
  stage: unit_tests
  artifacts:
    paths:
      - fastlane/screenshots
      - fastlane/logs
  script:
    - fastlane tests
  tags:
    - ios

test_flight_build:
  dependencies: []
  stage: test_flight
  artifacts:
    paths:
      - fastlane/screenshots
      - fastlane/logs
  script:
    - fastlane beta
  tags:
    - ios
  only:
     - /^release-.*$/
     - master
See the .gitlab-ci.yml documentation
for more information on how this file works.
Setting up the lanes
You should have a lane - in this example called beta - which should do the usual, match, gym, pilot, to distribute an updated Test Flight version, and one lane tests which calls scan to run UI Tests.
Auto-incremented build number.
To get an auto-incremented build number you can use something like the following lane:
lane :increment_build_number do
  increment_build_number(build_number: ENV['CI_BUILD_ID'])
end
Then the GitLab CI build ID (which iterates on each build) will be used.
Visual Studio Team Services
Microsoft Visual Studio Team Services (VSTS) and Team Foundation Server (TFS) use fastlane in their Apple App Store extension.
Getting Started
Once you have created or retrieved credentials for your App Store account, then perform the following steps to automate releasing updates from a VSTS build or release definition:
- Install the App Store extension from the VSTS Marketplace
- Go to your VSTS or TFS project, click on the Build tab, and create a new build definition (the "+" icon) that is hooked up to your project's appropriate source repo
- Click Add build step... and select the necessary tasks to generate your release assets (e.g. Gulp, Cordova Build)
- Click Add build step... and select App Store Release from the Deploy category
- Configure the App Store Release task with the desired authentication method, the generated IPA file path, and the desired release track.
Now when you build, your app will automatically be published to App Store Connect!
Configuring fastlane versions
The extension can be configured to install the latest version of fastlane or a specific version of fastlane:
- In the Build for your project, click on the Apple App Store task (supported in both
Apple App Store ReleaseandApple App Store Promote), go to the Advanced section of the Task, click Install fastlane - Optionally, select Specific Version from
fastlane version, and enter a specific version of fastlane
More Information
For more documentation, see the Apple App Store in the Visual Studio Team Server marketplace.
Nevercode Integration
With Nevercode you can set up automated builds for your Android and iOS application using fastlane. You only need a Fastfile in your repository to get started.
Specify app repository
- Click Add a new app on Nevercode dashboard.
- Choose whether to add your application via supported providers using OAuth or add it manually using the other available authentication methods.
Define the lane to be built
After specifying app repository, Nevercode takes a first look at it by listing the branches in this repository. The next step for you is to select the branch you want Nevercode to scan for projects.
- Select a
branchfrom the dropdown that Nevercode should scan. Note that you can change the branch later if needed. - Click Scan branch.
Nevercode scans the repository from the specified branch. This includes cloning the repository, looking up the available
Fastfilesand listing the pre-configuredlanes. All this can be monitored real-time from your browser via the live log window. - Once scanning the branch has finished, choose the
lanewhich will be executed as the main build step by Nevercode. - Finalize the setup by checking the appropriate build options and click Save and start build.
External dependencies
Nevercode does not automatically install CocoaPods, Carthage or any other external dependencies for fastlane projects. Please use the fastlane's built-in actions, such as cocoapods and carthage, to gain control of that.
Code signing
To perform code signing on your iOS app, you can either follow the best practices laid out in fastlane docs, or you could also make use of Nevercode's standard code signing methods.
When invoking match from the Fastfile, keep in mind that you need to grant access to the credentials repository and expose the match passphrase during the build. Both can be securely achieved thanks to the well designed environment variable support of fastlane and Nevercode's support for several SSH keys for authentication.
In your app settings on Nevercode, navigate to the Environment tab to manage environment variables and files:
- match passphrase can be defined as a
MATCH_PASSWORDenvironment file — this will be automatically detected by fastlane and used to decrypt the credentials repository. - You can upload the SSH key for cloning the credentials repository as an environment file, i.e.
MATCH_SSH_KEY. All environment files whose variable name has the suffix_SSH_KEYwill be automatically added to the SSH agent and will be ready for use during the whole build process.
Run tests
iOS
Testing in Nevercode with fastlane for iOS is 100% automatic. By default, scan is used to invoke the test run, but you can easily swap it out for any other lane that you have configured for your test runs. Test results are automatically collected and you don't need to do anything to convert the results from one format to another or place them in a special location on the build machine.
Warning
In case you wish to run tests as part of the main build step, we suggest that you use Trainer to generate reliable JUnit results from the test run and put the results in a directory where we can discover them:
trainer(output_directory: ENV["NEVERCODE_XUNIT_RESULTS_DIR"])
Android
Nevercode detects your fastlane tests for Android automatically. However, tests are disabled by default and have to be enabled manually.
- In your app settings on Nevercode, navigate to the Test tab.
- Click on fastlane Gradle to expand it.
- Select Enabled and type the lane name for tests as specified in your
Fastfile. - If you would like to run the tests on Android emulator, make sure to select Require Android emulator.
- Click Save to finish the setup. Your fastlane tests will be enabled and run each time you build your app.
Publish your build artifacts
You can use either fastlane to take care of artifact distribution or choose from a number of Nevercode's own integrations.
Manage build versions
To make your build version management easy, Nevercode exports the NEVERCODE_BUILD_NUMBER environment variable that you can use in your build script. For instance, you could make use of it within increment_version_number action to define a new version for each build.
More Information
Check out Nevercode documentation for more.