Getting started with fastlane for Android
Installing fastlane
Install the latest Xcode command line tools:
xcode-select --install
Install fastlane using
# Using RubyGems
sudo gem install fastlane -NV

# Alternatively using Homebrew
brew cask install fastlane
Setting up fastlane
Navigate your terminal to your project's directory and run
fastlane init
You'll be asked to confirm that you're ready to begin, and then for a few pieces of information. To get started quickly:
- Provide the package name for your application when asked (e.g. io.fabric.yourapp)
- Press enter when asked for the path to your json secret file
- Answer 'n' when asked if you plan on uploading info to Google Play via fastlane (we can set this up later)
That's it! fastlane will automatically generate a configuration for you based on the information provided.
You can see the newly created ./fastlane directory, with the following files:
Appfilewhich defines configuration information that is global to your appFastfilewhich defines the "lanes" that drive the behavior of fastlane
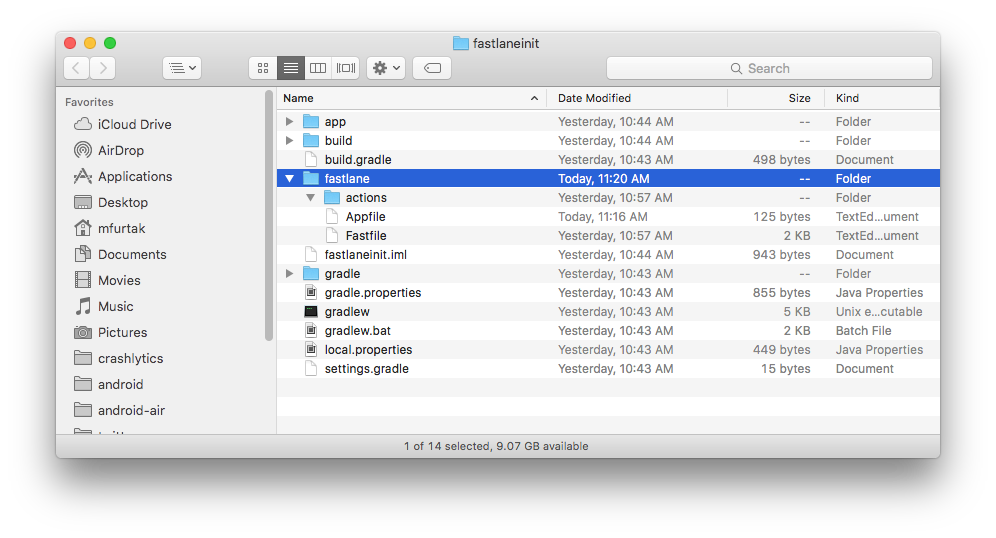
The most interesting file is fastlane/Fastfile, which contains all the information that is needed to distribute your app.
Setting up supply
supply is a fastlane tool that uploads app metadata, screenshots and binaries to Google Play. You can also select tracks for builds and promote builds to production!
Setting it up requires downloading a credentials file from your Google Developers Service Account.
Collect your Google credentials
Tip: If you see Google Play Console or Google Developer Console in your local language, add &hl=en at the end of the URL (before any #...) to switch to English.
- Open the Google Play Console
- Click the Settings menu entry, followed by API access
- Click the CREATE SERVICE ACCOUNT button
- Follow the Google Developers Console link in the dialog, which opens a new tab/window:
- Click the CREATE SERVICE ACCOUNT button at the top of the Google Developers Console
- Provide a
Service account name - Click Select a role and choose Service Accounts > Service Account User
- Check the Furnish a new private key checkbox
- Make sure JSON is selected as the
Key type - Click SAVE to close the dialog
- Make a note of the file name of the JSON file downloaded to your computer
- Back on the Google Play Console, click DONE to close the dialog
- Click on Grant Access for the newly added service account
- Choose Release Manager from the
Roledropdown - Click ADD USER to close the dialo
Configure supply
Edit your fastlane/Appfile and change the json_key_file line to have the path to your credentials file:
json_key_file "/path/to/your/downloaded/key.json"
Fetch your app metadata
If your app has been created on the Google Play developer console, you're ready to start using supply to manage it! Run:
fastlane supply init
and all of your current Google Play store metadata will be downloaded to fastlane/metadata/android.
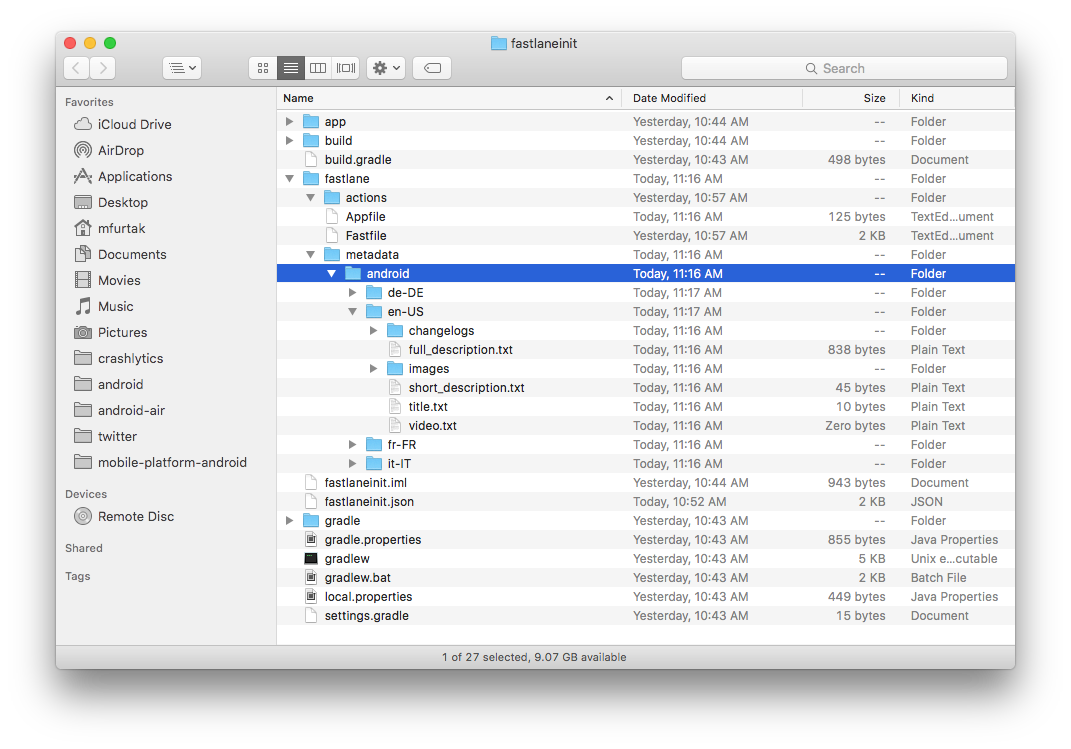
Due to limitations of the Google Play API, supply can't download existing screenshots or videos.
What's next?
fastlane is ready to generate screenshots and automatically distribute new builds! To learn more, check out:
Set up environment variables
fastlane requires some environment variables set up to run correctly. In particular, having your locale not set to a UTF-8 locale will cause issues with building and uploading your build. In your shell profile add the following lines:
export LC_ALL=en_US.UTF-8
export LANG=en_US.UTF-8
You can find your shell profile at ~/.bashrc, ~/.bash_profile, ~/.profile or ~/.zshrc depending on your system.
Use a Gemfile
It is recommended that you use a Gemfile to define your dependency on fastlane. This will clearly define the used fastlane version, and its dependencies, and will also speed up using fastlane.
- Create a
./Gemfilein the root directory of your project with the content
source "https://rubygems.org"

gem "fastlane"
- Run
[sudo] bundle updateand add both the./Gemfileand the./Gemfile.lockto version control - Every time you run fastlane, use
bundle exec fastlane [lane] - On your CI, add
[sudo] bundle installas your first build step - To update fastlane, just run
[sudo] bundle update fastlane